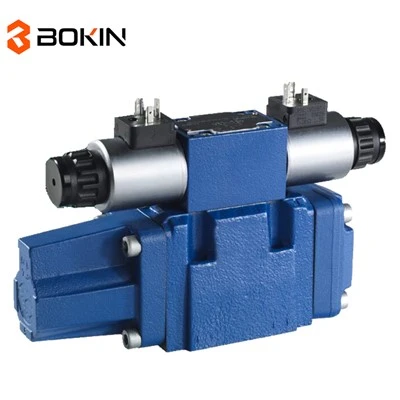
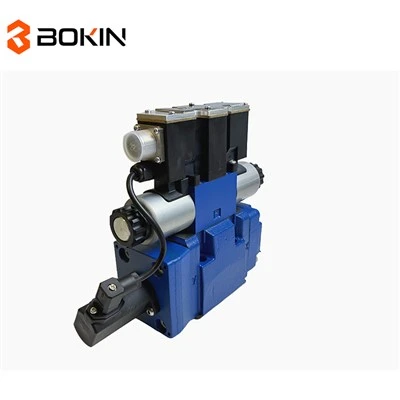
Hey there! As a supplier of Electro Proportional Valves, I'm stoked to share with you how to install one. These valves are super important in many hydraulic systems, controlling the flow and pressure with precision. So, let's dive right in and get you up to speed on the installation process.
What is an Electro Proportional Valve?
Before we start with the installation, let's quickly go over what an Electro Proportional Valve is. An Electro Proportional Valve is a type of valve that uses an electrical signal to control the flow of fluid. It can adjust the flow rate or pressure proportionally to the input signal, which makes it really useful in applications where precise control is needed.
Tools and Materials You'll Need
First things first, you'll need to gather the right tools and materials for the job. Here's a list of what you'll typically need:
- Wrenches: You'll need a set of wrenches to loosen and tighten the fittings. Make sure you have the right sizes for the valve and the pipes you're working with.
- Sealant: A good quality sealant is essential to prevent leaks. You can use thread sealant for threaded connections or gasket sealant for flange connections.
- Electrical connectors: You'll need to connect the valve to the electrical control system. Make sure you have the right connectors and wires for the job.
- Safety equipment: Safety first! Wear safety glasses, gloves, and any other appropriate safety gear to protect yourself during the installation.
Step-by-Step Installation Guide
Now that you have everything you need, let's get started with the installation process. Here's a step-by-step guide to help you through it:
Step 1: Prepare the Installation Area
Before you start installing the valve, make sure the installation area is clean and free of debris. Remove any dirt, dust, or oil from the pipes and the valve mounting surface. This will help ensure a proper seal and prevent any contaminants from getting into the system.
Step 2: Mount the Valve
The next step is to mount the valve to the pipe or the manifold. Make sure you align the valve correctly with the pipes and use the appropriate mounting hardware. Tighten the bolts or nuts securely, but be careful not to over-tighten them, as this can damage the valve or the pipes.
Step 3: Connect the Pipes
Once the valve is mounted, it's time to connect the pipes. Use the wrenches to loosen the pipe fittings and connect them to the valve ports. Make sure you use the correct size and type of fittings for the pipes and the valve. Apply a small amount of sealant to the threads of the fittings to prevent leaks.
Step 4: Connect the Electrical Wiring
Now it's time to connect the electrical wiring to the valve. Make sure you follow the wiring diagram provided by the manufacturer. Connect the power supply and the control signal wires to the appropriate terminals on the valve. Use electrical connectors to secure the wires and prevent any loose connections.
Step 5: Test the Valve
Once the valve is installed and the wiring is connected, it's time to test the valve. Turn on the power supply and the control system and check if the valve is working properly. You can use a pressure gauge or a flow meter to measure the flow rate and pressure of the fluid. Make any necessary adjustments to the control settings to ensure the valve is operating at the desired level.
Tips and Tricks
Here are some tips and tricks to help you with the installation process:
- Read the manufacturer's instructions carefully before you start the installation. This will help you understand the specific requirements and procedures for your valve.
- Use the right tools and materials for the job. Using the wrong tools or materials can damage the valve or the pipes and cause leaks.
- Take your time and be careful when installing the valve. Rushing the installation can lead to mistakes and problems down the road.
- Test the valve before you put it into operation. This will help you identify any issues or problems early on and prevent any costly repairs or downtime.
Common Installation Mistakes to Avoid
Here are some common installation mistakes to avoid:
- Over-tightening the bolts or nuts: This can damage the valve or the pipes and cause leaks. Make sure you use the correct torque specifications when tightening the bolts or nuts.
- Using the wrong size or type of fittings: This can cause leaks and affect the performance of the valve. Make sure you use the correct size and type of fittings for the pipes and the valve.
- Not using sealant: This can cause leaks and allow contaminants to enter the system. Make sure you use a good quality sealant to prevent leaks.
- Incorrect wiring: This can cause the valve to malfunction or not work at all. Make sure you follow the wiring diagram provided by the manufacturer and use the correct electrical connectors.
Conclusion
Installing an Electro Proportional Valve may seem like a daunting task, but with the right tools, materials, and knowledge, it can be a relatively straightforward process. By following the steps outlined in this guide and avoiding common installation mistakes, you can ensure that your valve is installed correctly and operating at its best.
If you have any questions or need further assistance with the installation process, don't hesitate to contact us. We're here to help you every step of the way. And if you're interested in purchasing an Electro Proportional Valve, we offer a wide range of high-quality valves, including the Pilot-Operated Hydraulic Proportional Valve 4WRKE10 F1 4-20mA Control and the Pilot-Operated Hydraulic Proportional Valve 4WRKE16 A1 10V Control. Contact us today to discuss your specific requirements and let's work together to find the perfect solution for your needs.


References
- Manufacturer's installation instructions for Electro Proportional Valves
- Hydraulic system design and installation guidelines